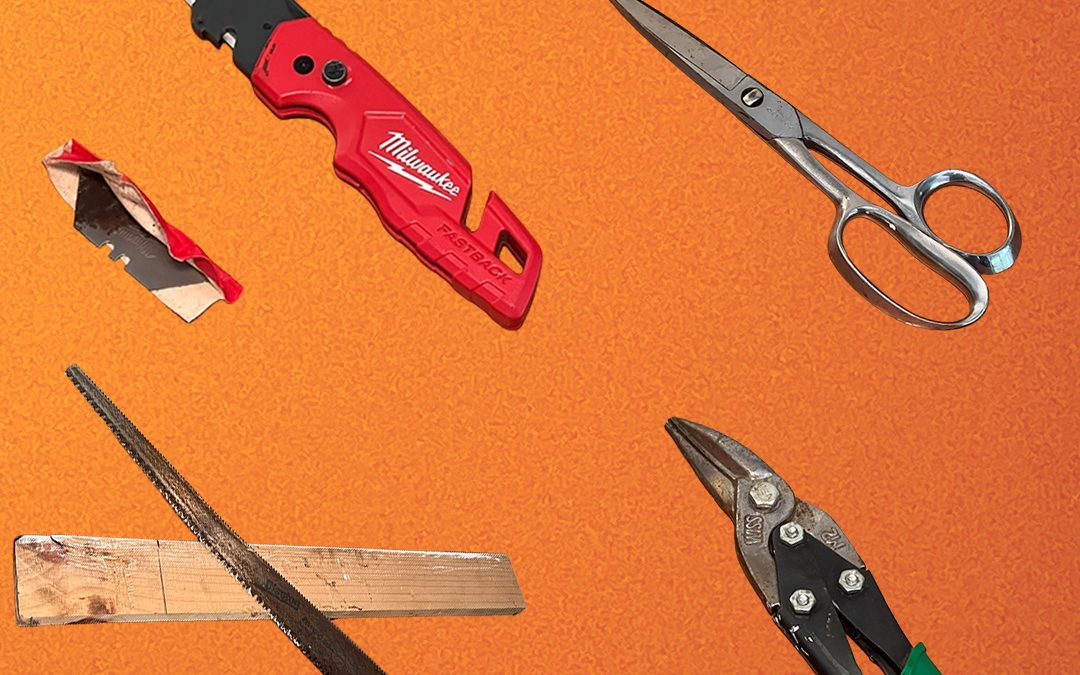
Cutting Tools 101: Utility Knives, Handsaws, Scissors, and Snips

Cutting Tools Video
(Coming Soon)
Table of Contents
- Which Cutting Hand Tools Does a DIY'r need
- Safety First – Always (Cutting Tools Are Sneaky Dangerous)
- Utility Knives 101: Not Just Box Cutters
- Handsaws 101: Straight Cuts Without Power Tools
- Snips 101: Cutting Thin Materials Without Tears (Yours or the Metal’s)
- Scissors
- No Bull Verdict: What Cutting Tools Should You Buy First?
- FAQ's
Which Cutting Hand Tools Does a DIY’r Beginner Need?
For most DIYers and new homeowners, your DIY beginner cutting hand tools list is short:
- Utility knife (retractable or folding) – for cardboard, drywall, carpet, caulk lines, and general cutting
- Handsaw (basic crosscut or panel saw) – for cutting boards, trim, and small lumber
- Snips (tin snips / aviation snips) – for light sheet metal, flashing, gutters, and thin metal hardware
- Scissors or Shears - use to cut lightweight materials, shipping plastic wrap, plastic straps, cardboard
These four cutting hand tools can handle a big chunk of real-world projects—if you use them safely and correctly. For more great hand tools, view our: "Tools for your DIYer Hand Tool Kit"
Cutting tools don’t just “sort of” hurt you—they cut straight through skin, tendons, and nerves if you get careless. Be diligent, pay attention to your cutting!
A big share of hand tool injuries involve knives, especially utility knives and box cutters. One safety bulletin estimates that up to a third of hand tool injuries come from knife use alone.
For handsaws and snips, always practice the following:
- Keep blades sharp and clean so you don’t fight the cut.
- Wear eye protection to avoid dust, chips, or metal fragments.
- Work on a stable surface and keep your other hand out of the cutting path.
At Must Own Tools, our two pillars stay front and center:
- Safety First – Always
- No Bull tool and project advice
This post is going to show you not just what to buy, but how to stay safe while you’re actually cutting stuff.
For a general DIY project safety foundation, review our blog post:
👉 Hand Tool Safety Basics for New DIYers (Safety First – Always)

Utility knives are crazy useful: they open boxes, cut drywall, trim flooring, score plasterboard, slice caulk lines, and more.
But they’re also involved in a lot of injuries when people haven’t learned how to use them safely rush or use dull blades.
Choosing a Utility Knife (No Bull)
You don’t need a crazy overbuilt utility knife. Look for:
- Retractable or folding blade (so it’s protected when not in use)
- Solid, non-slip handle you can hold easily and safely
- Easy blade change mechanism
- Option: self-retracting blade for extra safety (especially in busy spaces)
Skip dirt-cheap knives with flexy plastic bodies that feel sketchy in your hand. They break easily, provide less safety protection and don’t last long. Remember, you get what you pay for.

How to Use a Utility Safely (Step-by-Step)
For safe and effective use Must Own Tools recommends: use a sharp blade, make sure you have a good grip, always cut away from your body, on a stable workpiece.
1. Set Up Your Work
2. Limit the exposed cutting blade
3. Grip and Stance
4. Cut away from your body
5. Use multiple light passes
6. Retract and store
7. Blade Changes
No Bull Tip: A dull blade is more dangerous than a sharp one because it forces you to push harder, which makes slips more likely. Replace blades often; they’re cheap.
A good handsaw is perfect for cutting boards, trim, and small lumber pieces—especially when dragging out a circular saw is overkill. Handsaws are a must have tool for this DIY tools needed for the "Fix it Fast" DIY projects. When you don't have the time or need to set up a power saw, a good handsaw will get the job done.
Picking a Handsaw
For a beginner, look for:
- A general-purpose crosscut saw or panel saw (around 15–20" long)
- Comfortable handle
- Teeth marked for “universal” or “general purpose” cutting
This will handle most “cut this board shorter” tasks you’ll face as a beginner. More advanced saws (back saws, Japanese saws, hacksaws) can come later.
Handsaw Safety Basics
Must Own Tools recommends these core safety ideas:
- Wear safety glasses to keep sawdust and chips out of your eyes.
- Clamp or hold the work firmly before you cut.
- Start the cut slowly, make a groove to avoid the blade jumping.
- Keep the blade sharp and clean so it cuts easily.

How to Use a Handsaw (Step-by Step)
1. Mark your cut line
2. Secure the work
3. Grip and posture
4. Start the cut
5. Let the saw do the work
6. Finish safely
- Slow down near the end of the cut to avoid splintering or losing control as the piece separates.
Safety First-Always: Don’t saw overhead or hold a branch or board with one hand while sawing with the other—use supports or a helper instead.
Snips (often tin snips or aviation snips) are for light sheet metal: flashing, gutters, roof edge trim, some metal siding, light plastic, and brackets. They’re not for heavy rod, bolts, or hardened steel.
Types of Snips (Quick Overview)
- Straight-cut snips: mostly straight cuts, gentle curves.
- Left-cut / right-cut aviation snips:designed to cut curves in one direction more comfortably.
- Long-cut snips: longer blades for long straight cuts.
You don’t need every color and pattern right away. One pair of straight-cut snips, or a basic left/right pair, can handle most beginner work.
Safety tips from CCOHS (Hand Tools - Snips,and other guides call out a few key points:
- Wear gloves – sheet metal and plastic edges can be razor sharp.
- Wear eye protection – small metal pieces can fly as you cut.
- Use snips only on material they’re designed for.
- Don’t try to cut material that’s too thick; it can spring the blades, slip off the metal or plastic and potentially cut you.
- Keep fingers away from the cutting edge and pivot.

How to Use Snips (Step-by-Step)
1. Mark your cut
- Use a marker or pencil to draw a clear line on the metal.
2. Select the right snips
- For a straight cut use straight snips.
- Your cut curves to the left or right use matching left- or right-cut snips.
3. Grip and cut
- Hold the snips with your dominant hand, the material with the other hand (or clamp it).
- Use steady, even pressure; don’t rush or jerk.
- Keep the waste side of the metal curling away from you as you cut to avoid binding.
4. Mind the offcuts
- The trimmed waste pieces are sharp. Handle them carefully, put them somewhere safe—don’t leave them on the floor.
- WEAR gloves! Cuts and scapes are not a planned or desired part of the DIY process.
5. Maintain your snips
- Wipe them down and dry them after use, and store them in a dry place to prevent rust.
Scissors
Scissors, while not commonly thought of as DIY project tool, a pair of scissors can be a useful addition to the DIY tool kit.
DIY uses for Scissors
- Cutting out cardboard templates for DIY projects, such as our "Building a Drone Landing Pad" project.
- Use them to cut plastic wrap on material or tool shipping boxes
- Cutting Plastic straps are another use for scissors.
Safety First - Always: Scissors are typically safer to use than a sharp knife for cutting plastic wrap, straps, paper and cardboard.

How to use Scissors Safely (Step by Step)
1. Sharp blades
2. Cut away from your body
3. Grip and Stance
4. Blades are tightly connected
Care and storage for scissors
Wipe the scissors after each use, make sure they are dry and store in a clean dry place. When it is time to replace a pair of scissors Must Own Tools recommends taping the blades shut so they don't open by mistake. Safety First -Always, open scissors could cut someone or something.
Must Own Tools recommends investing in a quality pair of scissors that will stay sharp and last.
No Bull Verdict: What Cutting Tools Should You Buy First?
Buy Now (Beginner Cutting Hand Tools)
- Retractable or folding utility knife + extra blades
- General-purpose handsaw (crosscut or panel saw)
- Pair of straight-cut snips (or a basic aviation snip set)
- Basic safety gear: safety glasses + light work gloves (heavier gloves for meta or plastic with sharp edges)
Add Later
- Specialized saws (back saw, Japanese pull saw, hacksaw) as projects demand
- Ultra-cheap blades that dull after a couple of cuts
- Oversized saws or snips rated for work you’re not actually doing
Skip (For Now)
- Fancy “multi-blade” knife systems that make blade changes confusing
- Ultra-cheap blades that dull after a couple of cuts
- Oversized saws or snips rated for work you’re not actually doing
No Bull Advice:No Bull: Cutting hand tools are not where you skimp oh poor quality. A quality, and simple utility knife, a decent handsaw, and a good pair of snips used with Safety First - Always habits will serve you better than a toolkit full of bargain tools you will never use.
.
- What cutting hand tools should a beginner buy first?
- How do I use a utility knife safely?
- What’s the best handsaw for a beginner?
- Are snips only for pros?
- Are dull blades safer than sharp blades?
- How should I store cutting tools safely in a home with kids?
Start with three basics: a retractable or folding utility knife, a general-purpose handsaw, and a pair of straight-cut snips. Together they’ll handle most cardboard, drywall, trim, small lumber, and light metal work you’ll see early on.
Use a sharp blade, cut on a stable surface, and always draw the knife away from your body and away from your other hand. Extend only as much blade as you need, make several light passes instead of one heavy cut, and retract the blade as soon as you’re done.
A general-purpose crosscut or panel saw (around 15–20" long) is a great starter. Look for a comfortable handle and teeth meant for “general purpose” use. This saw will handle most cutting of boards and small lumber you’ll face starting out.
No. Snips are beginner-friendly as long as you wear gloves and eye protection and only cut materials they’re designed for (light sheet metal, flashing, etc.). They’re perfect for simple roof-edge trim, gutters, and thin metal parts—just avoid forcing them through metal that’s too thick or hard.
It feels counterintuitive, but sharp blades are actually safer. Dull blades force you to push harder, which makes slips more likely and harder to control. Must Own Tools recommends replacing blades regularly instead of “muscling through” with dull ones.
- Retract or fold knife blades away from your body every time!
- Keep handsaws and snips in a toolbox or cabinet, not loose where kids can reach them, lock the cabinet if possible.
- Use blade guards where possible. Must Own Tools recommends keeping utility knives locked up, away from kids and pets.
- Store tools in one consistent, out-of-reach spot so you always know they’re secure.
Affiliate Disclosure: As an Amazon Associate, we may earn commissions from qualifying purchases from Amazon.com.
How we choose tool recommendations:
On Amazon we use the following criteria:
- We try, where possible to choose tools we use. In some cases we are personally using "hand me down" tools from family members and they are no longer available.
- Tools are ranked by purchasers 4.5 stars or higher
- Tools that have 50+ purchases in the past month, where possible. In some cases we may recommend "obscure" tools that are not purchased often, so 50+ purchases may not be realistic.
- Our tool recommendations are seldom sponsored. Should a manufacturer send us a tool to review we will call out the tool is sponsored.
Visit our YouTube

Visit our Instagram
