Measuring and Marking Tools 101: Tape Measures, Levels, and Squares

What Are Measuring and Marking Tools?
For a beginner DIYer, the core tools are
- A tape measure (usually 25 ft)
- A level (torpedo level or a 24″ levels are great starts)
- A carpenter’s square or speed square*
- A good pencil or fine-tip marker
- A chalk line
*A speed square (or rafter square) is a triangular carpentry tool, trademarked by Swanson Tool Company. This innovative tool combines 5 tools into 1: 1. Try Square, 2. Miter Square, 3. Saw Guide, 4. Line Scriber, & 5. Protractor.If you can measure and mark accurately and clearly, all of your DIY projects—from hanging shelves to building a small deck—is more accurate, safer, and cuts down on mis-cuts, wated time and materials.
Safety First – Always (Especially With “Harmless” Tools)
- Tape measure blades can snap back and cut fingers or hit eyes.
- Levels and squares used on ladders can lead to falls if you overreach.
- Any time you’re marking for a cut, you’re one step away from sharp blades and power tools.

Tape Measure
Must Own Tools is built on these two pillars

SAFETY FIRST - ALWAYS

NO BULL TOOL ADVICE
Must Own Tools Safety Rules
- Wear Safety Glasses when there is any chance of flying materials (look for ANSI A87.1 on the frame.
- Slowly guide the measuring tape back into its case—don’t let it whip back into the case at full speed.
- Keep your feet stable and hold levels or squares steady with you free hand.
- If you’re straining or leaning way off center just to see a bubble or line, stop and move so your body is in a more relaxed position or the workpiece so you are steady and centered.
For more safety advice visit our Safety First page.
Why you should pay attention to Measuring and Marking your projects
A lot of DIY frustration comes from one simple, boring thing: bad measurements.
- A shelf that isn’t level looks cheap.
- A door that’s 1/4″ too big won’t fit.
- A stud missed by half an inch means your screw is just in drywall, not something solid.
Good measuring and marking habits:
- Make projects look better
- Help things last longer
- Keep you safer, because you’re not forcing parts to “kind of fit”
You don’t need fancy lasers to measure your project correctly. You just need to use three core tools: the tape measure, the level, and the square.
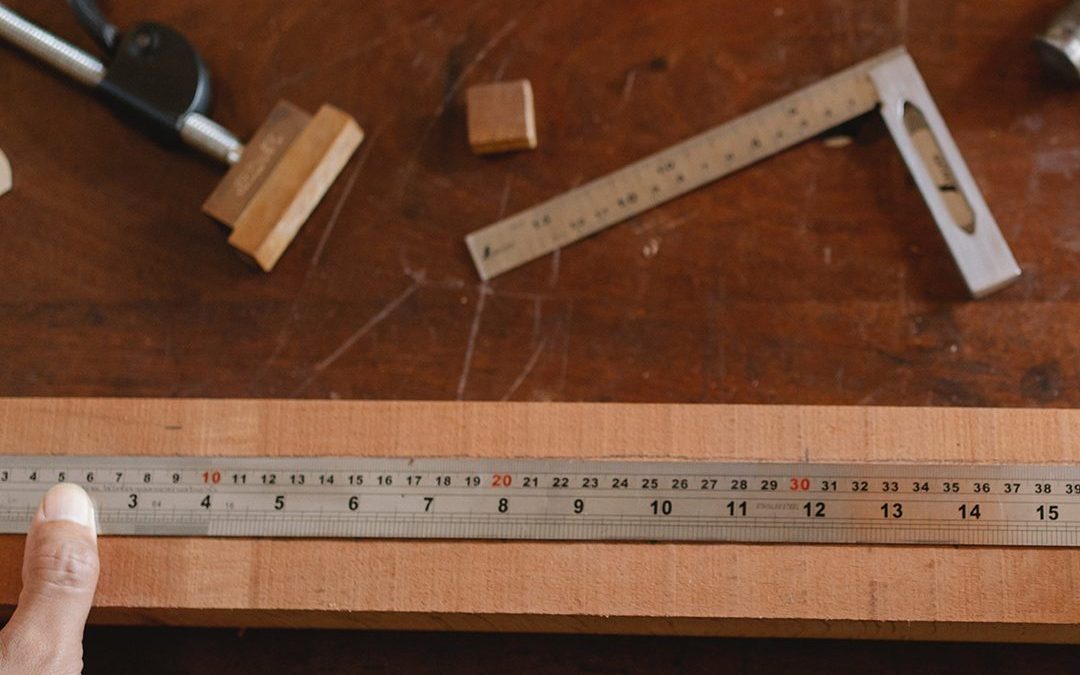
Tape Measures 101: How to Use and Read a Tape Measure
Choosing a Tape Measure (No Bull)
For most homeowners, a good 25 ft tape measure is perfect. Look for:
- A clear, easy-to-read blade (inch marks and fractions)
- A strong case and smooth lock/retract action
- A metal hook at the end that moves just a tiny bit (that’s on purpose—it helps you measure inside and outside edges accurately).
You don’t need a $40 pro tape, but the cheapest bargain-bin model with a flimsy blade and sticky lock will drive you nuts.
How to Read a Tape Measure (Simple Version)
Most US tapes use inches, split into fractions. A standard blade has 16 little marks between each inch.
Quick way to think of it:
- Big numbers = inches (1, 2, 3…)
- Medium lines = 1/2″
- Slightly smaller = 1/4″
- Smaller = 1/8″
- Tiny = 1/16″
If you want a visual walkthrough, check out guides like Johnson Level’s “How to Read a Tape Measure” or Reeb’s tutorial for clear diagrams.
How to Use a Tape Measure Safely and Accurately (Step-by-Step)
- Hook or press the end
- Hook it over the edge of a board, or press the hook firmly into a corner.
- Pull the tape straight
- Keep the blade as straight as possible; big curves = bad measurements.
- Lock the tape
- Use the lock to hold the measurement in place so you’re not fighting recoil.
- Look straight down
- Read the measurement with your eye directly over the mark to avoid parallax (that “off to the side” distortion).
- Mark Clearly
- Make a small “V” with your pencil where the measurement crosses the workpiece, not just a random dash.
- Retract slowly
- Thumb on the underside of the blade, guide it back in so it doesn’t whip.
Safety First Tip: Steel measuring tape edges can be surprisingly sharp. Control the retracting blade and keep your fingers away from the edges.
Levels 101: How to Use a Level
A level tells you if something is perfectly horizontal (level) or vertical (plumb). For a beginner, a 9″ torpedo level or a simple 24″ bubble level is ideal.
Basic Parts
- Body: the long, straight part.
- Vials: small curved tubes with liquid and a bubble.
- Lines on the vial: when the bubble sits between the lines, that surface is level or plumb.

How to Use a Level (Flat Surface)
- Place the level flat against the surface (shelf, countertop, etc.).
- Let the bubble stop moving and settle.
- Level: bubble centered between the lines.
- Low side: bubble drifts toward the higher end; adjust or shim the low side, recheck.
Using a Level on a Wall (Hanging Stuff)
- Lightly mark where you think the shelf/picture should go
- Hold the level so its top edge is on your marks.
- Rotate slightly until the bubble centers between the marks in the level.
- Draw a straight line along the level. That’s your true level line.
Safety First Tip: When using a level on a ladder or step stool, keep three points of contact (two feet, one hand) and don’t lean way off to one side. Move the ladder instead.
For more depth, refer readers to practical guides like Apartment Therapy’s beginner-friendly “How to Use a Level” or Johnson Level’s calibration tips for keeping a level accurate.
Squares 101: Carpenter Square and Speed Square for Beginners
A carpenter’s square or speed square helps you draw straight, square (90°) and angled lines on wood and other materials.
Carpenter Square vs Speed Square
For most new DIYers, a speed square for DIY projects is the easiest place to start.

Carpenter's Square (Framing Square)
L-shaped, great for framing layouts and stair stringers.

Speed Square
Triangle-shaped, easier for beginners; sits snug against the board edge.
How to Use a Speed/Carpenter Square (Basics)
- Square cut (90° line)
- Hook the thick edge of the square against the board edge
- Draw a line along the other side—this is a perfect 90° cut line.
- 45° line
- Use the 45° edge on a speed square to mark miters for picture frames or trim.
- Marking repeated measurements
- Measure once with your tape measure, mark with your pencil, then place the square on the mark to make a full cut line.
If readers want more detail, recommend tutorials like Instructables’ “How to Use a Speed Square” or Family Handyman’s step-by-step guides.
No Bull Tip: You don’t need every square or measuring tool on the wall. One good speed square will handle a huge percentage of basic DIY marking tasks.
Marking Tools: Pencil, Marker, and Chalk Line
The best measurements in the world don’t help if your mark is a not legible.
- Carpenter’s pencil or mechanical pencil:
- Easy to control, easy to erase or sand off.
- Fine-Tip Marker:
- Good for rough surfaces, but avoid on finished surfaces.
- Chalk line:
- For long straight lines (decks, fences, long cuts).
Safety First: When snapping chalk lines on ladders or scaffolds, keep balanced and don’t lean way out just to reach one more foot—move the ladder.

Chalk Line
No Bull Buying Guide: What You Actually Need
Let’s separate the must-haves from the nice-to-haves
Must-Have Measuring and Marking Tools
- 25 ft tape measure (clear markings, smooth retract)
- 9–24″ bubble level
- Speed square (or basic carpenter’s square)
- Carpenter’s pencil / mechanical pencil
Nice-to-Have (Add Later)
- Longer level (48″) for big projects
- Chalk Line
- Laser distance measurer
- Combination square (great for detailed work)
Things to Skip (At First)
- Huge marking and measurement “kits” full of gimmick tools you’ll never use
- Novelty tape measures or squares that trade accuracy for cuteness
- Dirt-cheap levels that feel flexible or don’t sit flat
Safety First – Always Never offset quality at the expense of Safety. Always consider safety when purchasing new tools.
No Bull Verdict Start with one good tape, one good level, one good square, and a pencil. Learn them well. Add fancy tools only when a project truly calls for them. Better to have a few accurate tools than a drawer full of junk you will not use.
Mark & Marking DIY Frequently Asked Questions
You only need a few basics
You should have a 25 ft tape measure, a small level, a speed or carpenter’s square, and a good pencil. With those tools, you can measure rooms, hang shelves and pictures, cut boards to size, and lay out most small DIY projects accurately.
Keep one thumb lightly on the underside of the tape as you retract it and use the lock when needed. Guide the tape back into the case slowly instead of letting it whip in at full speed—this protects your fingers, the hook, and the tape itself.
25 ft tape measure
For most homeowners, a 25 ft tape measure is the sweet spot. It’s long enough for almost any room or basic project, but still easy to carry and control. Longer contractor tapes are nice on job sites, but overkill for everyday DIY.
You can eyeball small things
A level will save you a lot of re-do work. Even slightly crooked shelves, pictures, or counters are noticeable. A basic bubble level is cheap, reliable, and gives you a clear answer—level or not—without guesswork.
You can eyeball small things
A speed square is compact, easy to hold against a board, and makes it simple to mark 90° and 45° lines. A full-size carpenter’s square is great for framing and stairs, but it can feel bulky for small projects.
Make a clear mark at your measurement
Use your square to draw a full line across the material. A small “V” pointing to the exact measurement is often easier to see than a single dash. Always cut on the waste side of the line so your finished piece stays true to size.